December 30, 2008

New year, new leaves...

I can't believe that 2008 is nearly over already, it seems to have passed by so quickly.  This point in the year lends itself so naturally to being a time to reflect, and that's the thing about writing a blog, it's all here, in the archives, a years worth of posts.  As we've been doing a bit of traveling and visiting over christmas, we've also had time to have more of those conversations, you know, the ones where Mr LK opens the top of my head, asks a few questions and then waits for something profound to happen.  He's actually very good to talk to about the important stuff, I've often thought about sticking him online here for a web chat!  He'd certainly open up some interesting thoughts for anyone who feels they were a bit stuck in a rut creatively. 

Our conversation last night was mostly about the future, our future, the house's future, his future and the future of Lucykate Crafts.  There is a lot I don't know the answer to yet, but one thing I do know, is how lucky I am right now.  Lucky to have had, and still be having this time at home, with the children and the time to try out Lucykate Crafts.  It hasn't always been like this, for 12 years I was the main breadwinner, I returned to work when Lucy was only 5 months old, she was with a childminder from 8 til 5, every day.  Everything came to a head when she called me by our childminders name, and we all knew in an instant, things had to change.  And change it did, now Mr LK brings home the bacon, and given that he essentially has 3 jobs, my official post in this house is to look after the family, make sure everyone is fed, happy, and the toilet is clean!  Any time spent on Lucykate Crafts is a real luxury and a joy for me, something to savour and expand.  So, what is going to change here in 2009?  Well, I suppose if I write it down, then I have to stick to it, right?!  So here goes, plans for 2009,

1.  I think I'd like to re-design the blog layout and colour scheme
2.  Learn how to use the graphics software I have in order to design a range of patterns
3.  Launch a range of patterns both in paper and PDF format
4.  Bring together my ideas for a craft book and refine the whole concept
5.  Launch a more official web site to sit in conjunction with my blog
6.  But firstly, I really want to revisit the eye patch tutorial.  I get emails regularly from grateful parents, who after struggling to get their child to cooperate with patching, have made one of these.  It is about time I followed it up with some more detailed instructions for a boys version.

As always, after christmas, there is a pile of new reading material to get me started...,

I love the format of Anna Maria Horner's book, it's like a little folder, a pocket at the back for patterns and is spiral bound inside.  There is something about books like that, that call out and say 'pick me up, open the pages and sew'!  

We're off on another trip in the next few days, so no doubt our in car conversation will continue and help me continue to develop my ideas and aspirations for Lucykate Crafts.  But for now, it's knitting (sewing for me) club tonight, and I have absolutely nothing ready to take along.  No unfinished projects, no softies on the go, nothing!.  I'm tempted to just fling some fabric in a hoop, grab some thread and a needle and embroider up a little stitchette design made up as I go along, what do you think?!

December 23, 2008

Merry 'crafting' Christmas!

Well, it's almost here, and this year I have never been so relieved that I only had two presents to hand make.  I have been ill, and after three days in bed, am finally just beginning to come back to life.  If it wasn't flu, it was a pretty close second.  Both Lucy and Luke have had it as well, and are also luckily now on the mend, good job too as tomorrow is not only Christmas Eve.  Oh no, far more important than that..., 

it is Mr LK's birthday! (He'd like to point out he's not yet 40, just 39!)

Terrible day for a birthday, but still we manage to squeeze in a party, it is open house tomorrow afternoon for mince pies and mulled wine.

You are welcome to join us,

Merry Christmas from Lucykate Crafts...!

December 16, 2008

Meet...,

Marmalade,

and Rusty,

I had a yearning to make some softies, and this fabric was calling out to me from my stash,

it was a felted woollen skirt,

it's now Marmalade & Rusty!

December 13, 2008

Embroidery,

We are having an unexpected weekend at home, after packing the car at 9am this morning, and setting off for the Lake District to visit grandparents, we had to turn back, just 10 miles from home as Lucy threw up!  So, being a person who tries hard to always look on the bright side, I've spent the rest of the day doing all those little, lingering jobs round the house that I never get round to doing.  My tupperware cupboard is tidy, and Lucy's bedroom curtains now hang how they are supposed to.  This evenings job will be to make a start on the only 2 christmas presents I'm making this year, so it's a good job I got in a little flower practice earlier this week!

I'm actually really looking forward to these projects.  The flowers are totally made by hand...,

I love hand embroidery, there is something utterly fascinating about the way a needle and thread can turn a small amount of fabric and felt into something really special.  Not only that, it is both relaxing and theraputic to complete.

Which part of your crafting do you enjoy the most?

December 8, 2008

Flowers & stems...

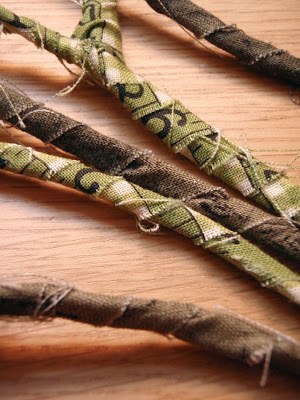
...are what I've been fiddling around with this week.  In amongst all the frost we are having (no snow here, yet!) a little bit of light shone through which gave all these lovely shadows.

I'll be taking these with me tomorrow night to sew the flower heads on.  I've joined a knitting group who meet up in a local pub once a week, I am the rebel as, not being a knitter, I take hand sewing along instead.  It's been really nice to get out the house of an evening to go along with a bunch of other crafters for a glass of wine and a chat while you sew. 

On the subject of nature, we went to get our christmas tree on Saturday, which, as usual for us (we are great sufferers of what we call here in the UK, as 'sods law'!), didn't quite go to plan, just the usual, kids squabbling, lights don't work, kids squabbling, tree falls over, kids squabbling and so on...!  To lighten the mood, we sat down last night and indulged in the Adams family yearly christmas tradition, of watching National Lampoons Christmas Vacation.  Doesn't matter how many times I see that film, it still makes me howl with laughter!

A big thank you to all those who stopped by for the robin tutorial, the winner is (from the online random number generator) comment number 46, which is Erika, from Crazy Button, who, if you are also crazy about buttons, has a rather lovely blog header, go see!

December 2, 2008

Robin tutorial

Right, here we go, as voted for in the christmas tutorial poll, a little 'how to' for a christmas robin.  You will need -

 background fabric of your choice (I used a red spotty print)
circle of brown fabric, 5cm diameter (mine is from a felted jumper)
circle of background felt in a colour of your choice (I used yellow), 5cm diameter
circle of felt for backing in a colour of your choice (I used green), 9cm diameter
red felt
brown felt
small white bead
green, red, and dark brown embroidery thread (I used pearl cotton 8)
a small amount of stuffing
sewing needle
scissors
embroidery hoop (optional)
16cm of ribbon or a blank greetings card for displaying


(print out the templates so the piece of paper they are drawn on is 10cm across)

Place your chosen background fabric in the embroidery hoop (or you can just hold it in your hand if you prefer), position the smaller circle of felt centrally, and attach with a ring of running stitch in green embroidery thread.


Next, take the brown fabric circle, and sew running stitch all the way around, about 0.5cm in from the edge, place a little stuffing in the centre, and pull the thread to gather it into a ball, secure with a few stitches.


With the brown thread still attached, sew the ball shape into position centrally to your base.  Next, cut the red breast shape from the red felt, and place on the left hand side of the ball (widest part of the template goes towards the top), sew on with random straight stitches in the red embroidery thread.


Cut the tail feathers, wing and beak from the brown felt.  Attach the tail using the brown thread and a few stitches at the base, positioning them with the shorter one above the longer one, continue to add the wing and folded over beak.  Then embroider two legs for your robin.  The next bit is a little tricky, still using the brown thread, after you have completed the legs, bring the needle through the robins body to the position you want the eye.  Thread on the bead, pushing it all the way down to the base, then before sewing the needle back through the bead, wrap the thread around the needle 3 times so essentially what you are doing is anchoring the bead with a french knot.  Be careful when going through the knot and bead not to pull too hard and pull the knot through the hole, what you want is the knot to sit above the hole.  If it does pull through, if your bead hole is bigger than mine is, then just make your french knot larger by wrapping the thread round more times.


Now you are ready to add some wording in red if you want to...,


and finish off by cutting down your backing fabric to a 9cm diameter circle.  Place this on top of the remaining circle of felt which is the same size and join the 2 together with blanket stitch round the edge in green.  You can either attach a loop of ribbon to the top of your robin and make a christmas decoration, or stick it on to the front of a greetings card, it's up to you!


If you make one, please do join the Lucykate Crafts... pattern pieces Flickr group so I can see what you've made.
Happy stitching!

December 1, 2008

How to..., design a softie, step three,

To round up this series, I really just want to talk a bit about decoration, embellishing and finishing off a softie.  As my background is in embroidery, it is only natural that it appears in a lot of my work.  My all time favorite hand sewn stitches include blanket stitch, which I use mainly for edging.  It is an ideal stitch for joining layers of fabric together for things such as wings, as it protects the raw edge from fraying.  

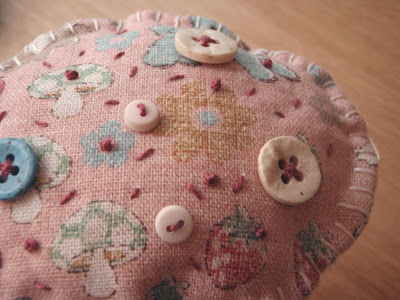
Seeding, is another stitch I often use, for instance, on the egg (above).  I like stitching seeding in a mixture of colours as it gives a subtle, yet effective decorative finish.  Seeding also works very well when mixed with french knots (below).  The majority of my embroidery is done in pearl cotton, mainly in size 8, but I do sometimes use 5 (thicker) and 12 (thinner) too.

In my own work, I tend to favour buttons over beading as decoration, no reason other than it is just my personal preference.  I love using embroidery on softies as it adds another dimension to the whole design.  Appliqued patches can be added in a decorative way, making the stitching part of the whole design, as well as functional.  I hand sew the faces for all my softies and find, many a time, that I unpick the mouth in particular, quite a few times and redo it to get it right, facial expression is very important.

Some other designers who I would recommend looking at if you are wanting to add embroidery to your design are...

Mimi Kirchner, her work has some very intricate embroidery involved, Louise, from Prairie Mouse, whose hand embroidery (in fact, all of her sewing) is so amazingly neat, and this one is not totally about embroidery, but my all time favorite softie maker, Stephanie Congdon Barnes.

One major part of finishing off, particularly if you are making softies to sell is, what are you going to call it?  Softie?, Plush?,  I tend to shy away from the term 'soft toy'.  In the UK, in order to market something as a soft toy, it would really have to go through laboratory testing for health and safety.  The difficulty in this for me, is I vary the patterns I work from, they are continually developing, and every time the pattern changed, it would need to be retested.  Over the past year, I have totally readdressed, in my mind at least, how I view my design work.  I have wrangled over the fact that my natural style is kind of cute, which visually, tends to automatically bracket my softies as a toy.  I know now, that is not where I want to be, where I want to be is more ornamental, sculptural, decorative, dare I say it... art?!

Another word which could be used is 'Stuffed',
 
I am very excited to say that some of my softies and an interview appear in the first issue, out January 2009.  The magazine looks amazing with some fascinating work featured.

So that's it for softies for today, it's back to refereeing arguments over the playmobil advent calendar and deciding whether or not we persevere in the name of sharing, or give in and buy another so they have one each!
November 24, 2008

How to..., design a softie, step two,

From pattern to prototype,

Apologies for the delay with this post, I fell behind with everything last week, poorly boy and poorly car.  Anyway, on with some more tips on progressing with that softie.  Next, you need to begin visualising your sketched design as a three dimensional object and identify the different shapes of fabric required to sew together, to build it up.  It is at this point decisions need to be made regarding the structure...,

...for instance, are you going to add in a gusset?, the image above shows a gusset added to the underbelly.  Gussets can be tricky to sew, but are worth persevering with as, I think, they do contribute to a more successful body shape, particularly with animals.

One vital point to remember is to add a seam allowance to all your patterns where needed, otherwise, your softie will end up a lot smaller than intended.  This is a mistake I have made, many a time!  The depth of seam allowance will depend on how much the fabric you are using frays, you don't want seams coming apart once your softie is stuffed, and also the thickness of the fabric, bulky seams will spoil a nice smooth body shape.

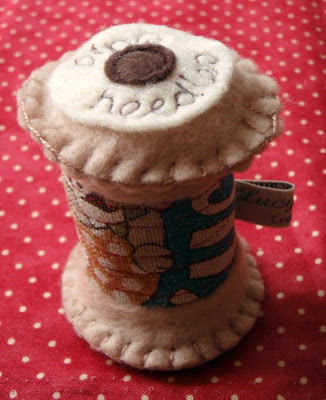
Going from paper pattern to fabric, is really just a case of trial and error.  It is very rare that I make anything that is right first time, there is usually quite a bit of ongoing pattern development.  For example, the cotton reels,  I drew out a basic pattern on paper, began to sew it up in fabric as a tester, but it wasn't quite right, so I re-drew the pattern and tried again.  Still, it wasn't quite right, so went back to the begining...

(my first 3 attempts at the cotton reels, there were more!)

Here (below) is something new I have been working on, the bees.  The first (the yellow one) looked more like a mouse to be honest (all it needed was a tail!).  I was really struggling with the wing size and shape in relation to the body, the wings looked more like ears.  With the second, I settled how and where I wanted to add stripes, but was still not happy with the wings (too big), and most definitely not happy with the larger eye!

With softie design, or indeed, anything three dimensional, designing can only be taken so far on paper, after that, you've just got to get the sewing started.  When it comes to fabric choices, I am a bit of a believer in the 'anything goes' philosophy.  After many years of working within the constraints of the textile manufacturing industry, it is great to be able to express my creativity with fabrics now.  I love mixing old and new, felted sweaters as a base with newer fabrics as an accent are my current favorites.

When I'm working small, I tend to make any prototypes in my already chosen fabrics.  If it doesn't work, there is not much wasted, and personally, I find it helps me work out the finer details, embellishments, buttons, embroidery I want to add, which I will talk about more in part three of this 'How to design a Softie' series.

Part three will be along later this week, and after that, I will finish off November with the christmas robin tutorial.  Its a busy week ahead, but Thursday is being kept free, Thursday is special, Thursday is the day I am meeting up with some other UK craft bloggers, more on that after Thursday!

(am praying my car doesn't break down again, please, please, pretty please!)

November 17, 2008

It's f-f-f-freezing...

...in our house during the day.  When I'm the only one in, I simply can't warrant putting on the heating just to warm up the smallest room.  So this evening have just whipped up these...

wrist warmers!


As I have so many felted jumpers lying around, all I did was chop off about 22cms worth of sleeve for each, cut a slit in the seam for my thumb, took it in slightly on the sewing machine (I have skinny wrists!), then blanket stitched round the raw edges (ie, the thumb hole and the bottom edge).  I also added a final bit of decoration, a (chocolate coloured, naturally!) flower.  The cuffs have been turned over to give me a bit more finger room for sewing (and breaking my bar of chocolate into chunks), and can be turned back to warm my hands up again, nifty hey!

Now my hands are toasty, I can get on with writing up the next steps of the softie tutorial and the christmas robin too, oh and a new Sew Hip project, oh and then there's the american magazine, the list goes on, and on, and on...!

November 11, 2008

Just a quickie...

Etsy shop update going on...

have just listed the poppy & vase and a couple of cotton reel pincushions today, 

more to come soon!

November 10, 2008

How to..., design a softie, step one,

Ideas, inspiration and resources, through to pattern development. 

This isn’t intended to be a definitive guide to designing, just a run through of the methods I employ, which have been honed down over the years I have been crafting. When it comes to softie design, the first step is to choose or at least have a vague idea, of what it is you would like to make, be it animal, insect, doll, inanimate object etc.  Once you have that, next, you need to begin searching for reference through the various resources available in order to refine the initial idea.  I find inspiration firstly, in amongst the books and magazines I have here at home, then by doing basic Google image searches.  For the purposes of illustration, I am going to show an owl (I can’t show something new really, have to keep at least some secrets!), first for actual real life owls, owl drawings and/or illustrations, and then for owl softies (can you spot mine?!), also trawling places like Flickr and Etsy. This is a very useful way of collecting inspiration and will also help identify what is already out there, design wise, is order to avoid any potential copyright conflict.  When I'm searching for ideas, in addition to looking for examples of styling and techniques that inspire me, I'm also looking at ideas to avoid, which may have already been done many times before.  I prefer what I make, to have it's own unique features and characterization.

There are some new online softie resources I've come across recently, the first has been created by Jhoanna of One Red Robin, a whole website dedicated to Softiemaking.  Then there is the website to go along side the 'Softies' books, (I have only just managed to get hold of the first softies book, and now they have brought out another!).  Both are full of ideas, links and downloadable free patterns to get you started.   On the MyCraftivity website, I have recently started a group covering plush and textile sculpture, which you can join to show and share what you make.  In addition to these, there is also Plush You and Softies Central which are both well worth checking on a regular basis, and a list of other places to look in the 'softie link' section in my blog sidebar. 

Once you have some images pulled together, it's time to get the sketchbook out.  It is through this process, that the inspiration you have collected, will develop into a much more personalised idea.  I tend to re-draw my design over and over again, each time taking it further away from what I have been using as reference, and closer towards the finished design.  


I also like to try and draw it from different angles, given that what you are going to construct out of fabric is in 3D, this is a useful way to think about how the different components will fit together, and also serves to highlight the various different pattern pieces you will need to draw.


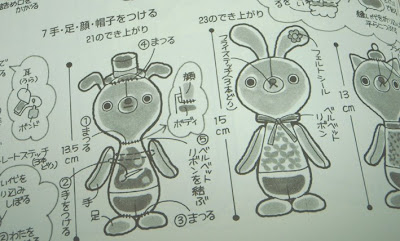
Japanese craft books are ideal for gaining an insight into breaking down a sketch of a softie into a pattern, even if you can’t understand the words, the illustrations are hugely educational and convey most of what you would need to know in picture form.

Step two will be next, covering going from pattern to prototype, choosing fabrics and additional materials and the actual making of the softie. Now, I need to get back to my own sketch book and work on some new designs, thank you for all the ideas from my previous post, a huge help. 

See you soon!

November 4, 2008

I'm still here...!

Can't believe it's been 2 weeks since I last posted, school holidays are now over until christmas, and our break was jam packed full of playdates, visiting family, shopping for new furniture, building new furniture all intermingled with a lot of coughing and colds all round.

I have been playing with my sewing machine though, and given the freehand embroidery a whirl...

am working on transforming the cotton reel idea into pin cushions for Etsy.

But look what happens when you visit your mum for a few days and leave your sketchbook unattended, her new puppy tries to eat it!

Now that the first issue of 'Sew Hip' has arrived in the shops, if you do make a kitten from my pattern, please do join the Flickr group to show and tell.

I am at that point with design work where I need to do some brainstorming and expand my pattern portfolio, so will be spending some time working on new ideas for a range of small softies.  While I am doing this, I am going to document the process and feature it here, in a series of blog posts.  The first will cover ideas, inspiration and development, the second will talk about selecting materials and making a prototype from your initial pattern, and the third will cover the finer details, embellishing and finishing off your softie.  Hopefully this series will inspire the designer within you to emerge!

But first things first, in order to kick start the whole process, how about a few ideas from YOU!

What shall I make?, animal, insect, plant, doll or inanimate object?

October 20, 2008

Fluffy stuff...

I'm really starting to feel a need to get back to designing some new softies.  I have been making the odd one, but nothing to a new pattern for a while now.  But due to not being 100% happy with the polyester stuffing I have been using, I didn't want to start anything new without addressing this.  So, inspired by this post by Mimi Kirchner all about stuffings, I went on an internet mission last week to track down a UK supplier of some more suitable fibres.

I like my softies and any of my soft fabric sculptures to have a bit of weight to them, it is part of what separates them from being classed as a toy and more as a piece of art.  The stuffing I had been using is very light and foamy, and whilst it is very easily acquired, and easy to work with, was somewhat lacking in guts when it came to the finished article.  I also have a yearning for some natural wool stuffing, so here is what I came up with...

this is carded white lambswool,

and as I was buying unseen, I also played it safe and went for some of this, white polyester staple.  They both have a really nice texture to them, and pull apart easily into small chunks, and came from this supplier.  The main problem I had was with the quantity.  It is sold on weight, and I just could not get my head round visualising exactly how much stuffing 4kg was going to be.  The quantity I bought was based on economy more than anything, I wanted a reasonable amount that would last a while and save on any repeat postage should I run out too soon and need to re-order.  Turns out 4kg is quite a lot of stuffing...

there's loads of it! 

Oops!

October 16, 2008

Catching up...

I've spent this week catching up with myself on all the unfinished sewing projects.  There are a small range of items to go to a real, bricks and mortar local craft shop which I'm about half way through, in addition to a few bits and pieces to make a mini Etsy update of 'red' inspired designs.

(by the way, this is the flower pincushion I created in pattern form, for the subscription gift pack for 'Sew Hip' magazine)

Our half term holiday from school starts on Monday, and at this time of year we have 2 weeks off, so crafting time will be limited to the evenings, if I can keep my eyes open by then, hence, the catching up.

One thing I did do, is join Twitter!, I've never been able to get my head round MySpace and Facebook, but Twitter seems like fun if you fancy joining.  Oh, and please take part in the poll for the christmas tutorial (see the blog sidebar), I'm aiming to post the whole 'how to' for it, in November and will make a start on the instructions once we have a winner!

Another announcement is that since I now have so many patterns and tutorials available, with the kitten also being out there and available in Sew Hip magazine, I've created a Flickr group for anyone who has made something from my patterns to show off their creations, whether it be an eye patch, the jam pot topper or an owl egg cosy...,


Please do join, I'd love to see what has been made!

October 13, 2008

Red,

Despite the fact that, in my work, I seem to naturally gravitate towards the colour pink, at home, I am actually a real fan of the colour red.  Our couch is red, most of our bedding linen is red or has some red in it, and all my kitchen accessories are red.

So, I guess, a red flower was a natural progression...

and something I'm going to keep going with as I think 'Red' will be the theme of my next Etsy shop update.

I have already planned on some christmas birds which will feature a vintage christmas card with each, and also am working on some cotton reel pin cushions, all of which, fit rather nicely with a red theme.  Before then though, I have a disaster to put right, in an attempt to get a better photograph of this latest flower this morning, I kicked over my button box, spilling the contents all over the floor, now that's going to be a job and a half to sort out!

October 6, 2008

Ideas...

I've had an idea in my head for the last few days, and yesterday evening at about 10pm, decided on the spur of the moment to see if I could re-create it in fabric...

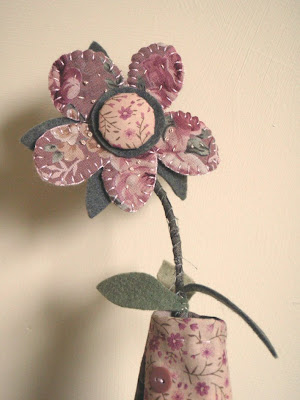
...it involves a flower,

a stem,

and a vase, all made from fabric and felt.

Did it work?, what do you think??